Accounts
All Altova app subscriptions must be made through an account of the Altova Cloud Portal. Note the following key points about accounts:
•The user who creates an account is the main administrator of that account
•The main administrator—as well as other administrators of that account—can invite new users to the account (as account administrators or account members)
•Administrators can remove account members and other account administrators from the account
•When a user logs in to the Altova Cloud Portal, all the accounts of which they are members or administrators are displayed on the Select an Account page
•An account cannot be deleted
•Any of the account's administrators can subscribe the account to one or more Altova apps
•Any of the account's administrators can grant any of the account's users access to a subscribed app. An administrator can also terminate an account user's access to an app
In this topic, we describe how to create and manage accounts.
Create a new account
Thee are two environments in which a new account can be created:
•If you sign up as a new user, a Create New Account form will appear immediately after you log in so that you can directly create a new account
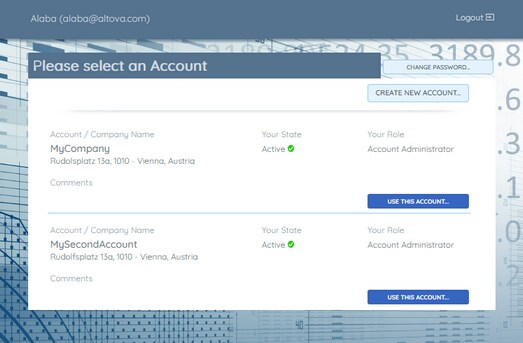
•The Select an Account page, which is usually the first page that appears on login, contains a Create New Account button (see screenshot below) that takes you to the Create New Account form
Both these situations lead you to the Create New Account form, which is the common starting point for creating a new account. Here you enter basic details about the account. These would typically be your company's name, address, and ID. Note that only the name and country fields are mandatory. When you click Continue to save this information, a new account will be created and added to the list of accounts on the Select an Account page. For example, the screenshot below shows the Accounts page of an account administrator named Alaba. This account administrator (Alaba) has created two accounts, named MyCompany and MySecondAccount.
On the Select an Account page, you can do the following:
•Click Use This Account to go to the Account Overview page of the selected account (described below).
•Click Create New Account to add an account to the Accounts page.
•Click Change Password to change the current user's password.
•Click Logout to leave the Altova Cloud Portal.
Account Overview page
The Account Overview page is accessed via the Select an Account page (see above). It is different for account administrators and account members.
Account administrators
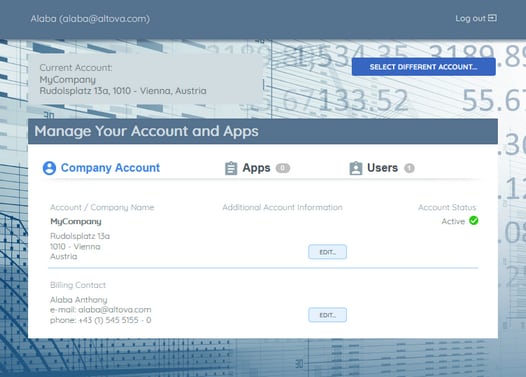
The Account Overview page for account administrators (screenshot below) has three tabs:
•Company Account, where you can edit account information. There are two categories here: (i) company information, which you already entered in the Create New Account form (see above); and (ii) billing information, which you will need to enter. Click the respective Edit button to update the respective information.
•Apps, where you can subscribe to Altova apps and manage the subscriptions. See the section Subscriptions for a description of how to do this.
•Users, where you manage the users of the account. How to do this is described below in the section Account Users.
To go back to the Select an Account page, click Select Different Account.
Account members
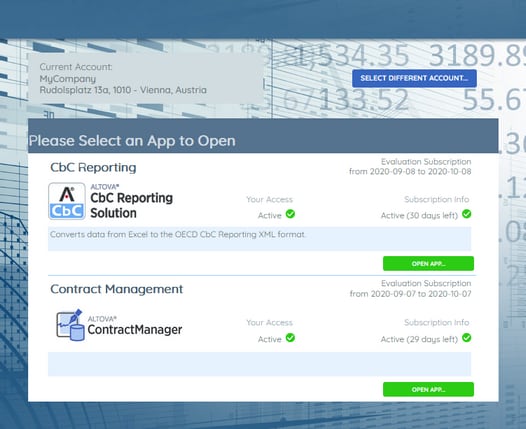
The Account Overview page for account members (screenshot below) displays the subscribed apps of the selected account to which the account member has been granted access. If the account member has not been granted access to at least one subscribed app, then a message to this effect will be displayed.
To go back to the Select an Account page, click Select Different Account.
Account users
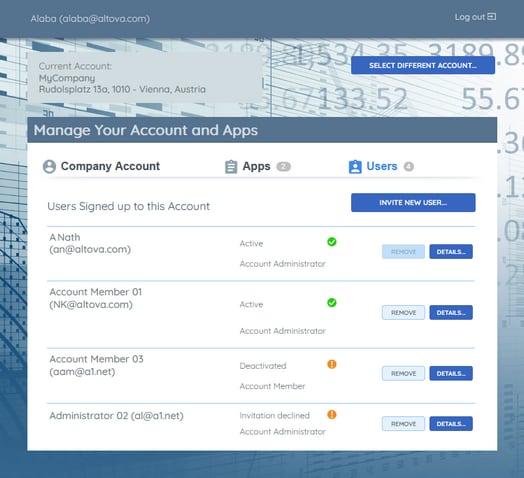
In the Users tab of the Account Overview page for account administrators (screenshot below), an administrator can do the following:
•Invite new users to join the account as an account administrator or account member. Click Invite New User, enter details of the new user (most importantly the email address) in the form that appears, and click Send Invitation. The invited user can choose to sign up to the Altova Cloud Portal, and, after logging in, can choose to accept or decline the invitation to join the account. The invited user will not be able to change their email address during sign-up.
•Remove a user from the account by clicking their respective Remove button.
•Additional functions are available in the User Details form, which you can access by clicking a user's Details button. See User Details below.
User details
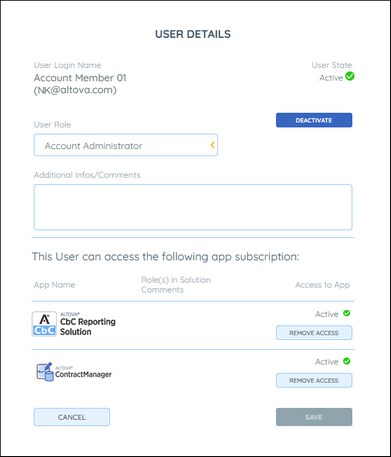
When you click the Details button of a user (see screenshot above), the User Details form (screenshot below) appears.
Here you can do the following:
•Activate or deactivate a user. Deactivating a user is different than removing the user. To reinstate a removed user, you would need to go through the entire invitation process again, whereas a deactivated user simply needs to be activated again. Note that a deactivated user will not be able to access the account and, consequently, will not be able to access any subscribed app even if the user's access to the app is still active.
•Change the user's role from account administrator to account member and vice versa.
•Remove a user's access to a subscribed app. An alternative to removing access is to deactivate access, which is done via subscription management.
After you finish making changes, click Save.
