Tutorial
This tutorial provides a step-by-step example of applying OCR to a scanned PDF document. The sample files are available at the following path:
C:\Users\<UserName>\Documents\Altova\MapForce<YEAR>\MapForceExamples\Tutorial\OCR
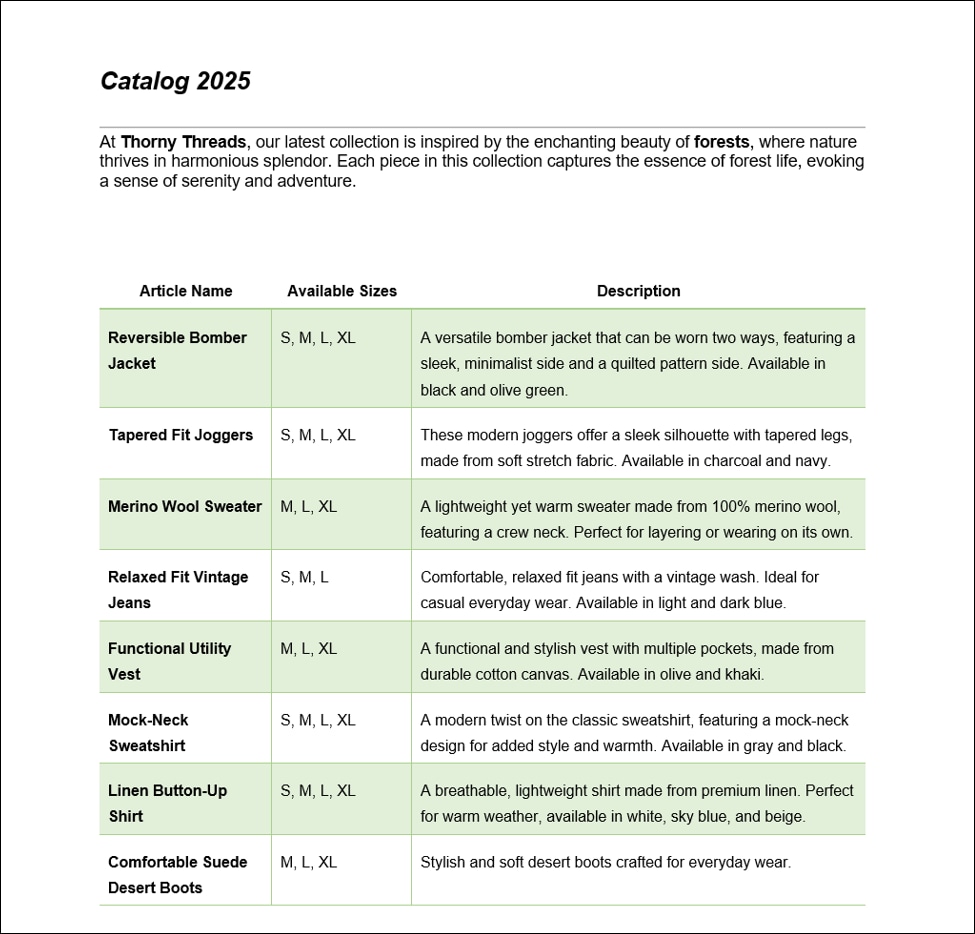
Source file: scanned PDF document
Our source file is a one-page scanned PDF document called Catalog2025.pdf (screenshot below).
Step 1: Create a PXT template and load the PDF document
At this stage, we have created a PXT file and imported our scanned PDF document (See also OCR Workflow).
Step 2: Revise detected words
When the newly created ocr.pdf document opens in a separate window, OCR is applied to the document automatically. The OCR results are displayed in the object tree (screenshot below). They can also be displayed in the document's scan area if the toolbar command Show Overlays is activated.
In our example, we have enabled the Show Overlays and Show All Overlays commands. Words highlighted in green are included in the tree of detected words. Words shown in red have been excluded because the OCR confidence may have been below the threshold.
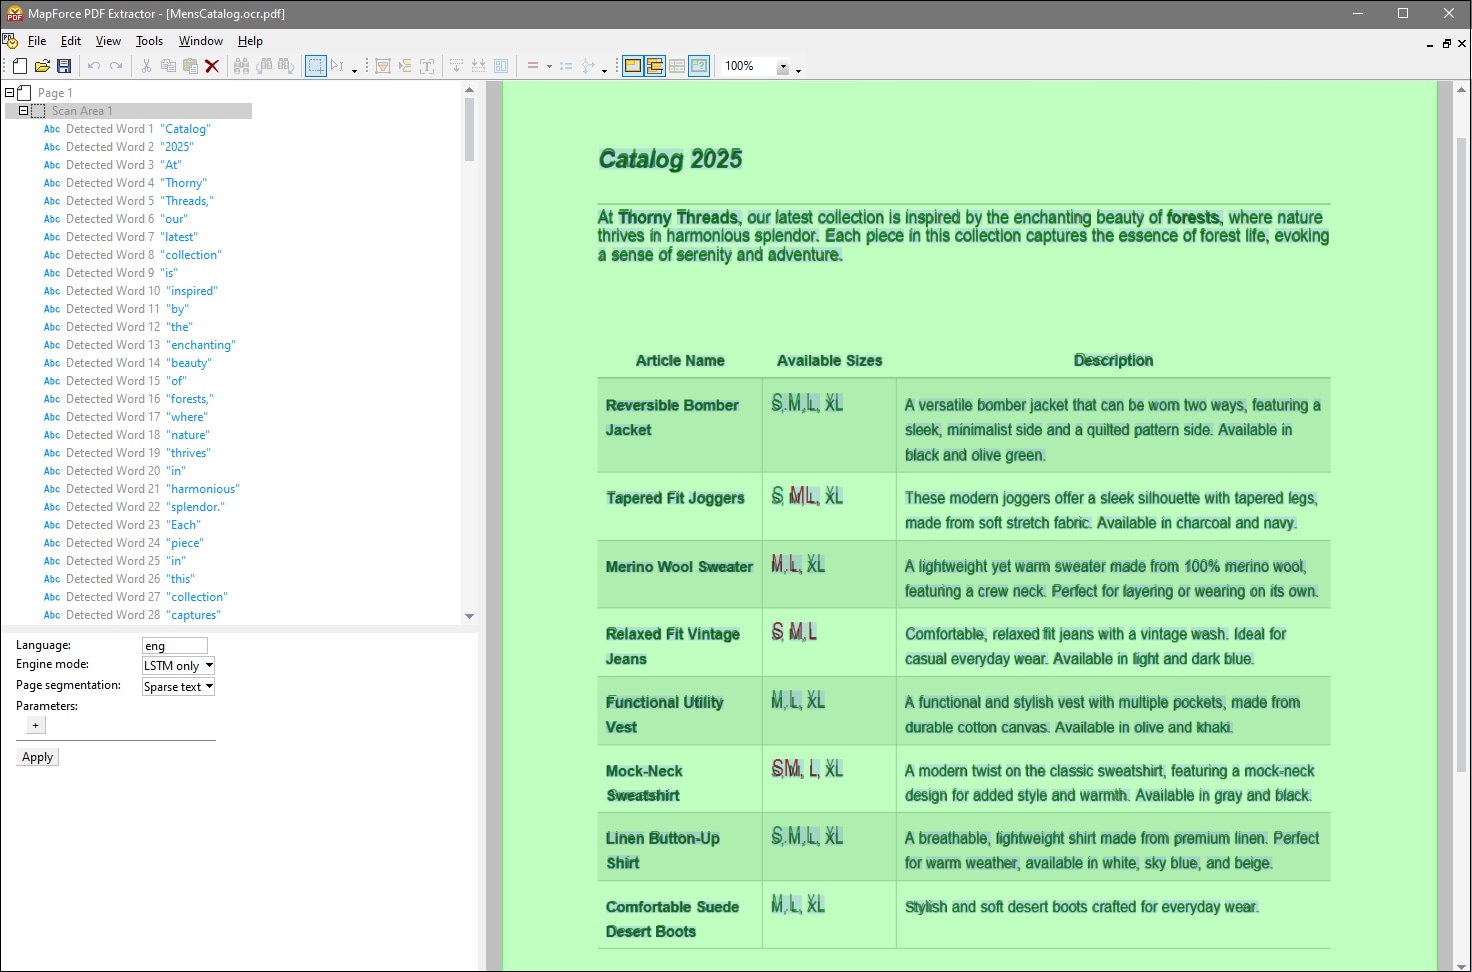
Overall, the OCR processor has correctly detected most of the text, except for some sizes. In this tutorial, we show one of the possible approaches to correcting the results. For example, in the cell containing information about sizes for the item Tapered Fit Joggers, two words have been identified (S and XL), and one detected word has been excluded (ML). To fix these results, proceed as follows:
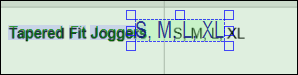
1.Click on ML in the PDF View Pane and delete this word. Do the same for XL.
2.Double-click S and edit the text to include other sizes: S, M, L, XL. When you have finished editing, click Enter. The edited words now appear as UserWords at the bottom of the object tree. Note that the edited text box might overlap with some other detected words (screenshot below). If this happens, text extraction may not work correctly.
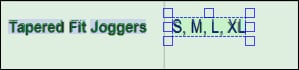
3.Position the text box in such a way that it closely corresponds to the original text as shown below. This ensures the text is extracted correctly.
4.Repeat the same steps for any other sizes that were detected incorrectly.
Step 3: Save the OCR template and define the PXT template
After you have finished editing the DetectedWords, save the OCR template and return to the PXT window. At this stage, the main goal is to create a template that enables you to extract the text detected by the OCR processor. Follow the instructions below.
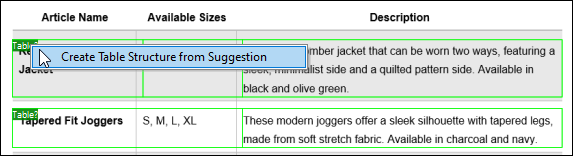
1.Make sure the Show Suggestions toolbar command is activated.
2.Use the first automatic table suggestion to create a table structure in the Schema Pane.
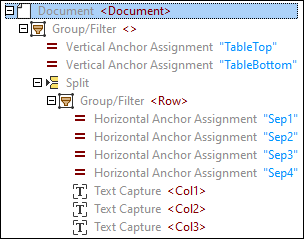
As a result, the following tree of objects has been created:
3.Since we used the table suggestion that contained only one table row, we need to move down the TableBottom to include all rows in the table. In order to do this, click the Vertical Anchor Assignment TableBottom in the tree, click on the TableBottom label in the PDF View Pane, and drag the line down.
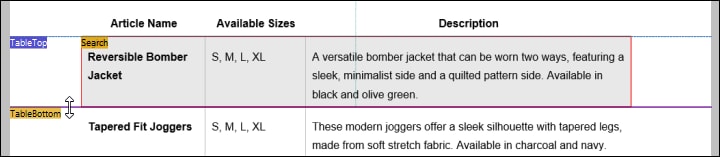
Changing the TableBottom updates the results in the Output Pane and includes all the table data.
4.Give the tree objects meaningful names as shown below. Changing the object names also updates the XML elements in the Output Pane.
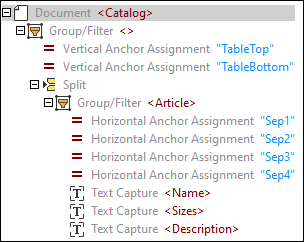
5.Create text captures for the catalog year and description as shown below.

Output
The template has successfully extracted OCR data from our scanned PDF document. The result is displayed in the Output Pane:
<Catalog> <Year>2025</Year> <Info>At Thorny Threads, our latest collection is inspired by the enchanting beauty of forests, where nature thrives in harmonious splendor. Each piece in this collection captures the essence of forest life, evoking a sense of serenity and adventure.</Info> <Article> <Name>Reversible Bomber Jacket</Name> <Sizes>S, M, L, XL</Sizes> <Description>A versatile bomber jacket that can be worn two ways, featuring a sleek, minimalist side and a quilted pattern side. Available in black and olive green.</Description> </Article> <Article> <Name>Tapered Fit Joggers</Name> <Sizes>S, M, L, XL</Sizes> <Description>These modern joggers offer a sleek silhouette with tapered legs, made from soft stretch fabric. Available in charcoal and navy.</Description> </Article> <Article> <Name>Merino Wool Sweater</Name> <Sizes>M, L, XL</Sizes> <Description>A lightweight yet warm sweater made from 100% merino wool, featuring a crew neck. Perfect for layering or wearing on its own.</Description> </Article> <Article> <Name>Relaxed Fit Vintage Jeans</Name> <Sizes>S, M, L</Sizes> <Description>Comfortable, relaxed fit jeans with a vintage wash. Ideal for casual everyday wear. Available in light and dark blue.</Description> </Article> <...> </Catalog> |
If you notice some issues with the extracted data in the Output Pane, you can adjust the OCR template, save it, and check the results in the PXT window again.
Next steps
The definition of the PDF extraction template is complete. The next step would be to import the template into MapForce and create a mapping to process the extracted PDF data.