Transformation Settings Reference
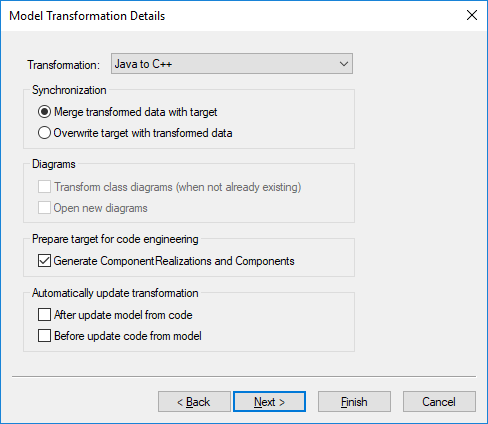
You can set or change how a model should be transformed into another model from the Model Transformation Details dialog box. This dialog box appears when you perform a new model transformation or when you update an existing one. For details, see Transforming UML Models.
| Note: | When you transform a model to C#, there is an option to transform fields to auto-implemented C# properties. This option is available as a check box in the Type Mapping dialog. To access the Type Mapping dialog, click Next in the Model Transformation Details dialog. |
The available options are described in the subsections below.
Transformation
Select the transformation source and target language. Options available in the list depend on the code engineering language of the package you select as source package. Note that this option is not available (disabled) if you re-run an existing transformation.
Synchronization
This option lets you specify whether the source data should be merged into the target data, or the target should be overwritten with the data from the source. For example, let's assume that a class in the source contains OperationA while the same class in the target contains OperationA and OperationB. If you choose "merge", then both operations will continue to exist in the target model. If you choose "overwrite", OperationB will be deleted from the target model.
Diagrams
The option Transform class diagrams (when not already existing) generates new class diagrams if they do not exist in the target model. To open all new diagrams after the model transformation is complete, select the Open new diagrams check box.
Prepare target for code engineering
Select the option Generate ComponentRealizations and Components if you intend to enable code engineering in the target package. When this check box is selected, UModel will automatically create ComponentRealization relationships and code engineering components in the target model. Before you can generate code successfully from the target model, make sure to also specify a code generation directory, as follows:
1.In the "Component View" package, click the component generated automatically by UModel.
2.Find the directory property in the Properties window, and enter a directory path.
For more information, see Generating Program Code.
Automatically update transformation
The setting helps you keep the source model synchronized with the target model. This setting is meaningful when your source model is configured to generate code (or be updated from code). If you make frequent changes to the source model (or its source code) after it was transformed to a target model, it is possible to propagate all changes to the target model automatically, as follows:
a)every time after you update the source model from the source program code
b)every time before you generate program code from the source model
c)in both cases above.
For example, let's assume your project contains a package originally created for C# code engineering. This package was subsequently transformed into a Java package, using the menu command Project | Model Transformation. After the transformation, you project has two packages: the source C# package and the target Java package. If option (a) is enabled, the transformation from C# to Java will take place automatically every time after you modify something in C# code and update the model with the changes. Likewise, if option (b) is enabled, and you changed the C# model, the transformation from C# to Java will take place automatically every time before you generate C# program code. For a more detailed example, see Example: Transform C# to Java.