Creating Derived Classes
This tutorial section illustrates the following tasks:
•Add a new class diagram to the project
•Add existing classes to a diagram
•Add a new class to a diagram
•Create derived classes from an abstract class, using generalizations.
| Note: | It is assumed you have already followed the previous tutorial section, Class Diagrams, to create the abstract class Account. |
Creating a new Class Diagram
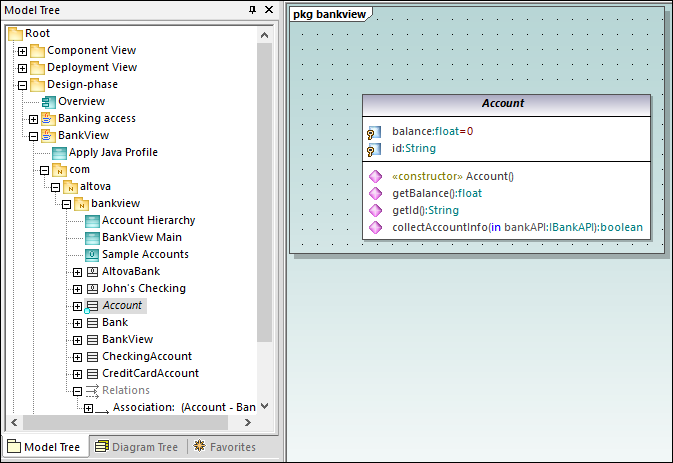
1.In the Model Tree window, right-click the bankview package (under Root | Design-phase | BankView | com | altova), and select New Diagram | Class Diagram.
2.Double-click the new "ClassDiagram1" entry, rename it to "Account Hierarchy", and press Enter to confirm. The new "Account Hierarchy" diagram is now visible in the working area.
Adding existing classes to a diagram
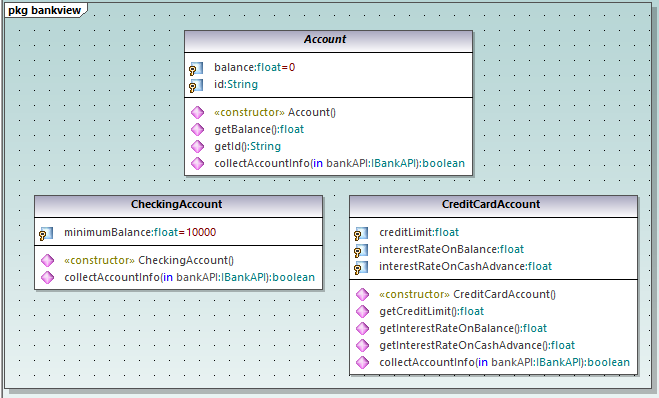
1.In the Model Tree window, click the Account class in the bankview package (under com | altova | bankview), and drag it into the diagram.
2.Click the CheckingAccount class (of the same package) and drag it into the diagram. Place the class below and to the left of the Account class.
3.Use the same method to insert the CreditCardAccount class. Place it to the right of the CheckingAccount class.
Adding a new class
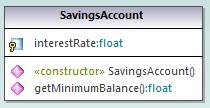
The third derived class, SavingsAccount, will be added manually to the diagram.
1.Right-click the diagram and select New | Class. A new class is automatically added to the correct package (bankview) which contains the current class diagram "Account Hierarchy".
2.Double-click the class name and change it to SavingsAccount.
3.Create the class structure as illustrated below. To add properties and operations, use the methods illustrated in the previous tutorial section, Class Diagrams.
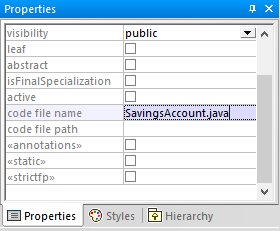
| 3. | In the Properties window, in the "code file name" text box, enter "SavingsAccount.java" to define the Java code class. |
Properties and operations can be directly copied or moved from one class to another:
•Within a class in the current diagram
•Between different classes of the same diagram
•In the Model Tree window
•Between different UML diagrams, by dropping the copied data onto a different diagram.
This can be achieved using drag and drop, as well as the standard Copy/Paste keyboard shortcuts (Ctrl + C, Ctrl + V), see also Renaming, Moving, and Copying Elements. For the scope of this example, you can quickly copy the collectAccountInfo() operation from the Account class to the new SavingsAccount class, as follows:
1.In the Model Tree window, expand the Account class.
2.Right-click the collectAccountInfo operation and select Copy.
3.Right-click the SavingsAccount class and select Paste.
The operation is copied into the SavingsAccount class, which is automatically expanded to display the new operation.
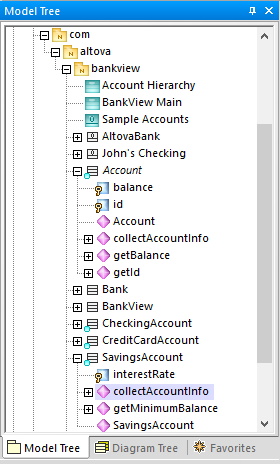
The new operation is now also visible in the SavingsAccount class in the class diagram.
Creating derived classes using generalization/specialization
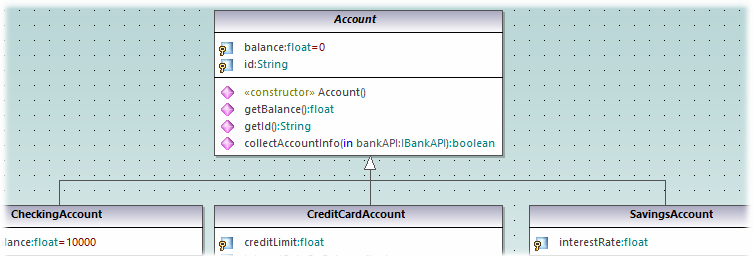
At this point, the class diagram contains the abstract class, Account, as well as three specific classes.

We will now create a generalization/specialization relationship between Account and the specific classes (that is, create three derived concrete classes).
1.Click the Generalization ![]() toolbar button and hold down the Ctrl key.
toolbar button and hold down the Ctrl key.
2.Drag from CreditCardAccount class and drop on the Account class.
3.Drag from the CheckingAccount class and drop on the arrowhead of the previously created generalization.
4.Drag from the SavingsAccount class and drop on the arrowhead of the previously created generalization: release the Ctrl key at this point.
Generalization arrows are created between the three subclasses and the Account superclass.