Create a "Hello, World!" Job
This example shows you how to create a simple job that outputs the text "Hello, World!" in the browser. The text will be created by means of a FlowForce expression. You will be able to trigger the job on demand by clicking a link in the browser (that is, the job will be exposed as a Web service).
Prerequisites
•Required licenses: FlowForce Server
•The FlowForce Web Server and FlowForce Server services must be listening at the configured network address and port
•You have a FlowForce Server user account with permissions to one of the containers (by default, the /public container used in this example is accessible to any authenticated user).
Creating the job
1.Log on to FlowForce Server and navigate to the /public container.
2.Click Create | Create Container and create a new container called "Examples".
The /public/Examples container is used by convention in most of the jobs illustrated in this documentation. You can create your jobs in any other containers as well, but if you want to follow all the subsequent tutorials from this documentation literally, it is recommended to create the /public/Examples container. |
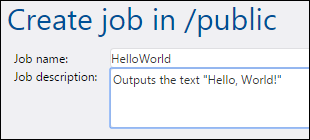
3.In the /public/Examples container, click Create | Create job, and enter the job title and description.
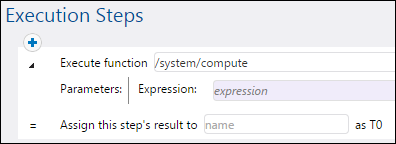
4.Add a new execution step which calls the built-in function  /system/compute.
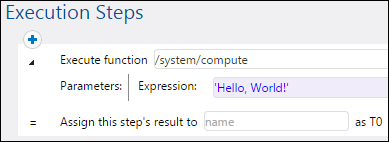
5.In the Expression field, enter the text 'Hello, World', enclosed within single quotes. The content of this field represents a FlowForce Server expression.
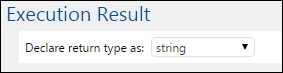
6.Declare the execution result as string.
7.Select the Make this job available via HTTP... check box and type "HelloWorldService" as service name. For more information, see Exposing Jobs as Web Services.

8.Under "Credentials", select an existing credential record or specify a local credential. For more information, see Credentials.
9.Click Save.
Running the job
You have now finished creating a job that computes the string value "Hello, World!" and returns it as the job result. To run the job, do one of the following:
•Go to Home, and then click Show all active triggers and services. Next, click the job's URL displayed in the "Info" column.
•Enter http://127.0.0.1:4646/service/HelloWorldService in the browser's address bar. Note that this URL works only if the FlowForce Server service listens at the default host address and port name. If you have defined other host and port settings in the Configuration page, change the address accordingly.
•If you set the optional Host name field of FlowForce Server from the Setup Page, you can execute the web service call directly from the job configuration page, by clicking the  button adjacent to the Make this job available via HTTP check box. The button is not displayed otherwise.
If prompted for credentials when accessing the Web service, supply the same credentials you use to log on to FlowForce Server.
Supplying your FlowForce Server user credentials for HTTP authentication is only for testing purposes. For production, it is recommended that you create a new FlowForce user, grant the Service - Use permission to this user on the container where the job is, and then access the Web service with the corresponding user account. To disable HTTP authentication and make the Web service public, grant the Service - Use permission to the user Anonymous, see How Permissions Work. |
If the job executes successfully, the browser displays the output of the job:
Hello, World!
If the job fails, the browser displays a "Service execution failed" message. In this case, check the FlowForce Server job log to identify the error.