Executing SQL
From the SQL Editor, you can execute both SQL statements written from scratch and those generated from database objects, as described in Generating SQL Statements. You can also execute SQL scripts opened from files. You can call the Execute command from the SQL Editor menu, from a keyboard shortcut or by clicking the Execute  button.
To execute SQL statements:
1.If there are multiple SQL Editor windows open, click inside the SQL Editor window where the statement to be executed is.
2.Make sure that the data source associated with the SQL Editor is connected  .
.
3.Optionally, select the statement or statements you want to execute.
4.Do one of the following:
•Click Execute .
•Select the menu command SQL Editor | Execute.
•Press F5.
If the data source is not connected, a dialog box appears asking you to connect to the data source. Click Connect if applicable.
After running the Execute command, all SQL statements that are in the SQL Editor, or the selected statements, respectively, are executed. If the statement retrieves multiple recordsets, the results appear in separate result windows, one for each statement.
You can also execute SQL scripts in the Project window if the SQL files are included in the project, as follows:
1.In the Project window, select an SQL file that you want to execute.
2.Right-click the file and choose Execute SQL from the context menu. If the data source is not connected, a dialog box appears asking you to connect to the data source. Click Connect if applicable.
The SQL script opens in a new SQL Editor window and is executed immediately.
Execute for Data Editing
When supported by the data source, you can execute a SELECT statement for data editing. This makes it possible to edit the retrieved records in the Result window after the SELECT query is executed.
To execute SELECT statements for data editing:
1.Generate or enter a SELECT statement in the SQL Editor window.
2.Make sure that the data source is connected . If it supports data editing from within the SQL Editor, the Execute for Data Editing ![]() button is enabled, and the menu command SQL Editor | Execute for Data Editing command is available.
button is enabled, and the menu command SQL Editor | Execute for Data Editing command is available.
3.Do one of the following:
a.Click Execute for Data Editing  .
.
b.Select the menu command SQL Editor | Execute for Data Editing.
The Result window is switched into the Editing mode and you can edit the database data directly in the result grid.
Stopping execution
DatabaseSpy uses asynchronous execution and retrieval when a query is started in the SQL Editor or from within a Design Editor window. While the execution is in progress, DatabaseSpy displays a message in the Message window.
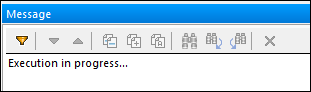
In the execution takes a long time, you may be able to cancel it by clicking the Stop Execution/Retrieval ![]() button in the SQL Editor toolbar. This button appears only while the execution is in progress. On cancelling the execution or retrieval of records, an "Execution was cancelled" message is displayed in the status bar of the Result window.
button in the SQL Editor toolbar. This button appears only while the execution is in progress. On cancelling the execution or retrieval of records, an "Execution was cancelled" message is displayed in the status bar of the Result window.
You can define a timeout for the execution of queries in the SQL Editor options. DatabaseSpy will attempt to stop retrieving data after the specified amount of time has elapsed. Note that the database kind and database driver must support setting a command timeout; otherwise, the query will continue running beyond the timeout period. In this case, you can stop execution using the Stop Execution/Retrieval  button; however, be aware that some drivers might not support cancelling the execution.
Defining the execution mode
You can choose whether to send the SQL statements to the database engine as a whole, or as separate batches. The Properties window provides the settings SQL Editor should require semicolons and Group statements for execution with for this purpose.
The setting Group statements for execution with provides the following options:
•Semicolons: The parser uses semicolons as statement separator. Any SQL code that is terminated by a semicolon is considered a statement and sent to the server separately. If semicolons are missing from your SQL script, a dialog box may prompt you to add them automatically.
•No Grouping: The script is sent to the server as a whole, without any modification. If the script contains multiple statements, and if the driver is known not to support executing multiple statements in bulk, this option is not meaningful. In this case, a dialog box may prompt you about this limitation.
•SQL Grammar: The respective flavor of SQL grammar is used to separate the statements when sending them to the server.
•GO keyword: A GO keyword must be present in the SQL script to separate execution blocks.
Showing execution groups
The toolbar in the SQL Editor provides the Show groupings for execution  button, which allows for a graphical representation of the statement blocks that will be sent to the database engine for execution.
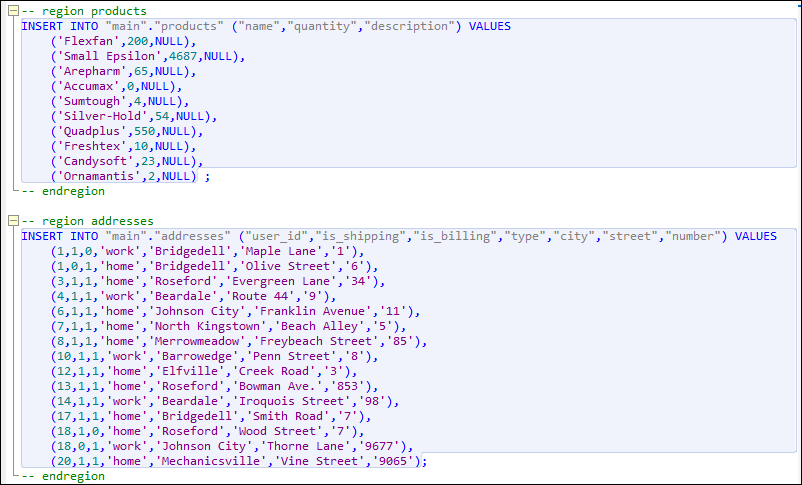
In the screenshot above, the groupings for execution are displayed when the "Semicolons" option is selected in the Group statements for execution with drop-down list.
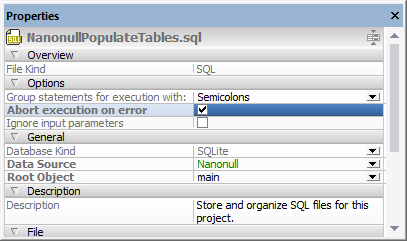
Stop execution on error
When the SQL Editor window is open, the Properties window includes a property called Abort execution on error. This option may be useful when you execute SQL scripts that contain multiple statements, and, if any statement fails, you would like the execution to stop at the corresponding statement. To enable this behavior, select the Abort execution on error check box.
Properties window
Consider the following example: you would like to run against the database a script which contains multiple INSERT statements. If the Abort execution on error check box is enabled, and an INSERT statement fails, the script will stop running at the INSERT statement which failed. In this case, any subsequent INSERT statements will not be executed. If the Abort execution on error check box is disabled, and an INSERT statement fails, the script will proceed to executing the rest of the INSERT statements, until the end of the script.
The execution status of the script (including the number of affected rows) can be viewed in the Message window, along with additional information about the error which occurred (if any). Click the underlined text in the Messages window to jump to the corresponding line in the SQL Editor.
Stop execution through a script comment
You can also stop execution at the first encountered error by adding the following comment to your SQL script:
-- abort_execution_on_error: true |
The abort_execution_on_error comment must be on one line and it can take any of the following values:
-- abort_execution_on_error: true|false|yes|no|y|n|1|0 |
To add the comment above to a script, do one of the following:
•Type the comment in the SQL Editor window.
•Place the cursor on an empty line in SQL Editor and then click the Insert Abort on Execution  toolbar button
•Right-click in the SQL Editor window and select Insert Abort on Execution from the context menu.
Make sure that the execution mode is set to "Semicolons", "GO keyword", or "SQL Grammar". Otherwise, the comment will be ignored. |
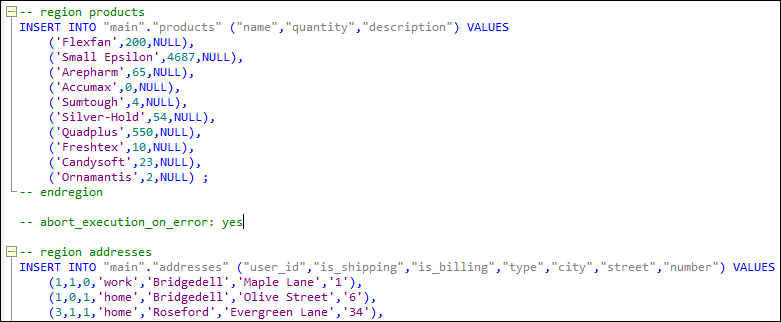
You can add the comment anywhere in the script. Note, however, that it will affect only those SQL statements that follow it. For example, in the script illustrated below, only the second INSERT will be affected by the comment. In other words, any SQL statement before the comment will stop execution on error only if the Abort execution on error property is set.
If there is text selected, the comment must be in that text for it to be applied.
Setting the comment is independent of the Abort execution on error property described previously—it neither modifies nor obeys the property.