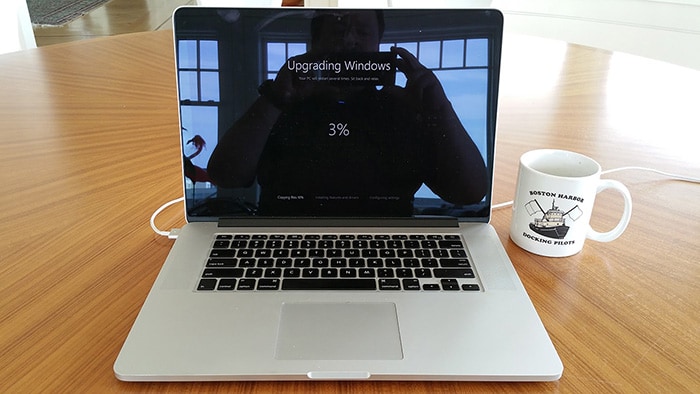
How to upgrade an old MacBook Pro to Windows 10
With the recent release of Windows 10, I embarked on a fun weekend project to convert my old MacBook Pro laptop (late 2013 model) into a new Windows 10 laptop. The process was surprisingly straight-forward, and the machine runs extremely well with all hardware features fully supported, including the high-resolution screen (“Retina display”), integrated camera (“iSight”), WiFi, Bluetooth, and all external ports. In fact, startup times, as well as time to wake from sleep, are slightly better than under MacOS, and all of the software, including Office, Adobe Creative Suite, etc., appears to perform better as well. I’m very happy with the result and this is now going to be my main laptop for all my business trips (and vacations) going forward.
You may ask why anybody would want to convert a MacBook Pro into a Windows 10 laptop in the first place. So let me explain my motivation…
Background
I’ve been using both Windows and MacOS devices essentially in parallel for the last 15+ years. For work I used mostly Windows machines and at home it was mostly Macs. And what I noticed over the past few years is that the built-in software for Mail and Calendar and Contacts in MacOS X got less useful with every iteration of the operating system from Mountain Lion (10.8) to Mavericks (10.9) to Yosemite (10.10). At the same time, the UI design got cutesier and more candy-colored -- but that didn’t translate to any productivity increase for me.
Since I wasn’t using Apple’s own iCloud offering as a sole repository, the integrated MacOS apps just didn’t play well with either my office email system on an Exchange server or with my personal email on Google Apps (i.e., GMail, calendar, and contacts on own personal domain).
So I ended up mostly using my browser of choice (Chrome) to access my personal email and calendar, and using Remote Desktop to my office machine for working with my office email/calendar/contacts. For photos I had been using Lightroom instead of iPhoto for many years already, so I wasn’t tied into the iCloud/iPhoto platform. The bottom-line is that I found I hadn’t been using any MacOS-specific apps for a long time…
In terms of software that I actually use all the time, the list is fairly concise:
- Adobe Creative Cloud (mostly Lightroom, Photoshop, and Illustrator)
- Microsoft Office 365 (mostly Outlook, Word, and Excel)
- Sublime Text 3 (my go-to programmer’s text editor for development purposes)
- Altova MobileTogether (for developing mobile apps on all platforms)
- Altova MissionKit (mostly XMLSpy, MapForce, DatabaseSpy, and DiffDog)
- MobaXTerm (for all my terminal/ssh needs to connect to Linux boxes, Raspberry Pis, etc.)
- Evernote (for sharing of notes and travel documents across all devices)
- Google Drive (for synchronizing my main file storage across all devices)
- Boxcryptor (for encrypting sensitive information that I store in Google Drive)
- 1Password (for generating and keeping track of randomly generated passwords)
- Fidelity Active Trader Pro
So I came to the conclusion that switching back and forth between using MacOS at home and Windows in the office was no longer giving me any tangible benefits. In fact, I expect this migration to produce some productivity increases due to keyboard shortcuts finally being the same across all my devices.
While I began to realize that I didn't need to use MacOS anymore, I still wasn't ready to give up my favorite laptop hardware. Looking at the available options for new Windows laptops, I found that they were not really superior to the laptop I already had, so I wanted to see if I could use Windows 10 on my MacBook Pro instead.
I had previously been using VMWare Fusion to occasionally run Windows applications on my Mac in a virtual machine, and that had worked really well for casual usage from time to time. However, once I realized I wasn’t using any MacOS-specific software anymore, I decided to instead use BootCamp to do a clean, native install of Windows as my primary OS on the machine.
BootCamp comes preinstalled in MacOS and allows you to partition your hard-drive and install Windows in parallel to MacOS as a native OS (rather than inside a VM). You can then decide which partition you want to boot from by default, and you can also switch the partition to boot from upon startup by holding down the “Option” key. I know of many people who divide their hard disk into equal partitions to be able to switch back and forth between MacOS and Windows as needed. However, if you need both OSs all the time, I find the VM approach to be easier to use.
For my purpose BootCamp was ideal: I decided to use Windows as my primary OS and so my goal was to partition the hard disk into a minimal MacOS partition (60GB) and use the rest of my 1TB SSD drive for Windows 10.
Getting started
Before you do anything else, make sure you have a complete backup of all your data. This process is potentially destructive to all the data on your hard disk!
So here are all the ingredients you will need for this upgrade process:
- An old MacBook laptop (mine was a Pro with Retina display from 2013, but this same process should work fine for any 2009 or younger MacBook Pro or Air)
- A Windows 10 license & product-key, which you can buy directly from the Microsoft Store
- A USB flash drive with at least 4GB capacity
- A large empty external USB hard drive, if you want to preserve a large amount of data from your old Mac hard disk and then copy it on your new Windows hard disk later
Please note that I actually did a 2-step upgrade process, because I began the migration a week before the final version of Windows 10 was released. So I bought and installed Windows 8.1 first and then upgraded to Windows 10 (for free) a week later. But you can do the exact same process straight to Windows 10 now by buying and installing a Windows 10 license directly.
Did I already mention that you should make a complete backup of all your data before proceeding?
The upgrade process
Here’s the sequence of actions to upgrade your MacBook Pro laptop to become a Window 10 machine:
- If you want to move a large amount of data from your old Mac laptop to your new Windows machine:
- You could either use Google Drive or DropBox or some other cloud provider to sync the data from one machine to the other (if you have a fast Internet connection).
- Or you could use an external USB hard drive. In this case, the important thing to do is to make sure that the external USB disk is formatted in the ExFAT file system, since that is the only file system that can be read/written to properly by both MacOS and Windows. Do not format it as HFS+ (Mac only) or NTFS (Windows only). On the Mac you can use Disk Utility to format the USB drive as ExFAT, or you can also do the same on a separate Windows PC. Once you have made sure the drive is ExFAT, copy all your files from the Mac hard disk to the external drive.
- Once all your data is secured, disconnect the external drive and put it away in a safe spot (or uninstall the cloud provider software). It is now time to clean up your Mac to minimize the disk space that the small MacOS partition will occupy in the future.
- You can either do that by starting from the Recovery partition on your Mac (hold down Command-R while your Mac boots) and then reinstalling MacOS from scratch and formatting the drive in the process. WARNING: This is destructive to all the data on your disk. Make sure you have a backup!
- Or you can use an app like DaisyDisk to identify what is using a large amount of space on your Mac and delete it from there. That, too, is destructive to your data, so make sure you have a backup!
- Even though you are trying to minimize the future size of your Mac partition, don’t actually try to repartition the drive manually. Instead, you want the full drive to be assigned to one Mac partition and you will later repartition it using the BootCamp Assistant as part of the installation process.
- When you are happy with the amount of space that MacOS now occupies, it is necessary to ensure that you’ve upgraded your MacOS to Yosemite (10.10) and have installed all the latest updates and security patches. I’ve found that the BootCamp version that is included with Mavericks (10.9) will not accept the Windows 10 installation disk and will not work. You have to first upgrade your MacOS to Yosemite before you proceed, which happens to be a free upgrade.
- Next purchase a Windows 10 license from the Microsoft Store and download the installation media. You will need to do that on a separate Windows machine, as the download from the Microsoft Store is a program called “MediaCreationTool”, which will in turn download the actual OS image and help you create the right installation media. Now it depends on whether you Mac has a CD/DVD drive or not. If you have a drive, you can simply use the MediaCreationTool to burn an installation disk. Otherwise, use it to create an ISO disk image file. If you are using an ISO disk image file, use the USB flash drive, your external USB hard drive, or a network drive to copy the ISO disk image to your Mac and put it somewhere in your Documents folder.
- Now it is time to actually install Windows using Boot Camp. To do so, open the Boot Camp Assistant, which you can find in the Utilities folder under Applications.
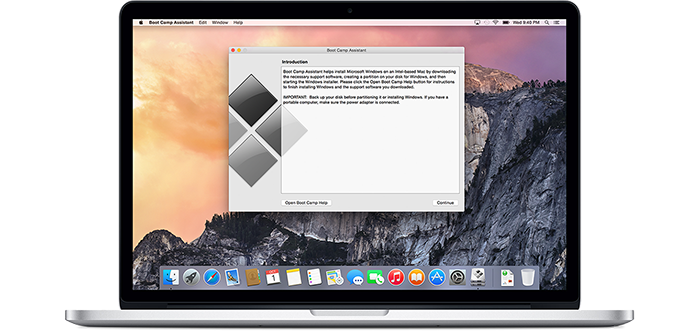 The information available about the necessary installation steps on the Apple website is only the most basic sequence of events, so I recommend that you continue following the steps I’ve outlined here instead.
 - Leave all the checkboxes in BootCamp Assistant turned on (i.e., allow it to download the latest Windows drivers for your hardware). BootCamp Assistant will then ask you to plug in a USB drive (which is where it will store those drivers for later installing them after the main Windows installation has completed).
- The software will then allow you to decide how much space to allocate to Windows and how much space to allocate to the MacOS partition.
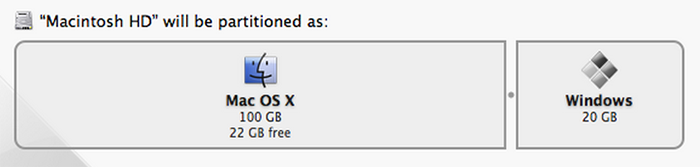 In my case I dragged the slider all the way to the left to give MacOS only 60GB and have 940GB available for Windows. Your specific requirements may be different, so pick a size that most closely matches how much time you expect to spend in each OS.
 - Once you click the “Partition” button, your Mac partition will be resized and a new partition will be created for Windows.
- There is a small caveat here – other people have reported not being able to resize their MacOS paritions under Yosemite, and I’ve had a similar issue in DiskUtility in the past. This can potentially be related to the Core Storage file system virtualization layer under Yosemite. If you run into a problem at this step or whenever you try to resize a partition under Yosemite, check out this blog post and follow the instructions there to revert from Core Storage to a regular partition table.
- Next the BootCamp Assistant may end up asking you to either insert the Windows installation media (if you have a DVD drive) or will ask you to locate the IOS image file that you copied to your hard disk earlier.
- Now all the pieces are in place for the actual Windows 10 installer to take over. Your computer will reboot several times throughout the process.
- In the first cycle, you will get the familiar Windows setup screen that lest you pick an installation language and keyboard.
- Next you will need to decide which partition you want to install Windows into. This is an extremely important step – make sure you find the partition named BOOTCAMP in the list, select it, and then click the “Format” button underneath the list. Once formatting is completed, the “Next” button will become enabled and you click that to proceed with installing into the new partition you created in step 9 above.
- Now let the Windows 10 installer run through, including 2 potential reboots of the machine. Once you are logged into Windows 10 after the entire Windows 10 installation sequence has completed, another installer should pop up for installing device drivers from the UBS stick. These are Windows-drivers from Apple that are specific to the particular hardware of your Mac. Make sure you install these! If the installer doesn’t start on its own, go to the USB drive and launch the setup.exe you will find there.
- Sometimes you may find that the screen resolution is not yet optimal at this point and you may need to do one more restart for all the Windows drivers to load correctly.
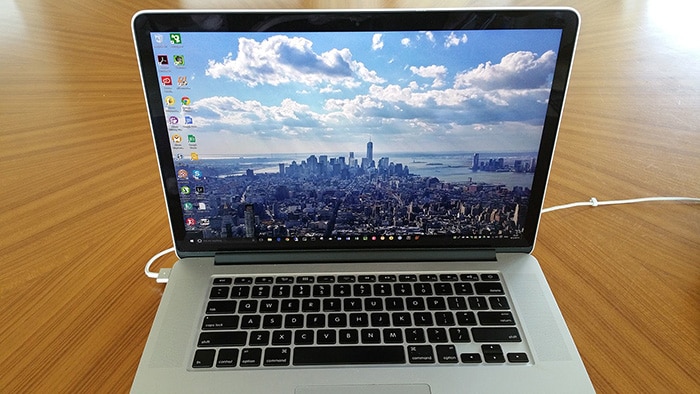
- Voilà! At this point you should have a clean install of a Windows 10 laptop in front of you and are ready to install whichever software you need on it.
- You can now also reconnect your external USB hard disk to copy all the necessary data files to your Windows partition. Since you formatted that hard drive in ExFAT it should be nicely readable from Windows.
- Last, but not least, I found the original Apple-supplied Windows driver for the trackpad on my MacBook Pro to not be as responsive and configurable as I would want. I found a 3rd party driver for the Trackpad that works much better - it is called Trackpad++.
Conclusion
While the installation process might seem a bit daunting at first, it is actually pretty smooth sailing once you know what to do. And the performance of the laptop with a fresh clean OS install is just wonderful. Windows 10 has essentially rejuvenated my laptop! Prior to this upgrade adventure I had also looked at various potential Windows laptop hardware from different manufacturers, and I found the MacBook Pro hardware to actually be superior to many Windows laptops being offered today, both in terms of performance to weight ratio, battery life, screen resolution, sturdiness of the case, and other factors.
The only thing I dearly miss on my new Windows 10 laptop is an actual “Delete” key on the keyboard. In true Apple purity the MacBook Pro keyboard only has a “Backspace” key…
Since this process worked so well on the old laptop, I’ve now begun the next project and am in the process of trying to also breathe some new life into my old Mac Pro tower, which is my main home office machine – and essentially my main photo editing station – and is a mid-2010 aluminum tower model with a 12-core Intel Xeon X5670 CPU running at 2.93GHz, 32GB of RAM, and an ATI Radeon HD 5800 graphics card, so the CPU and RAM are still highly performant and totally adequate for my average workload. I had previously posted (on my old blog) about removing the old Apple RAID card from that machine in 2014, so it already has a SSD drive as its primary boot disk. As you can see, I’m not afraid to tinker with hardware…
For this new project I have already installed Windows 10 on it (this time as a direct install rather than via a Windows 8.1 detour mentioned above) and it is working beautifully. As a next step I now have a new graphics card on order and will also be adding USB 3.0 ports to that machine to make it compatible with various external USB 3.0 hard disks.

The bottom-line is that Windows 10 performs beautifully on Apple hardware, such as the MacBook Pro or the old Mac Pro and can give a new life to these old machines. Of course, I’m not trying to tell you that Windows is better than MacOS. That is always a very personal choice, and if you like working with MacOS or are used to a lot of MacOS-specific applications, such as iPhoto, GarageBand, etc., or are tied into the iCloud ecosystem, then keeping these machines running on Yosemite might be the right thing for you.
But if you’re in a similar situation as I was, where you find yourself switching between Windows and MacOS machines all the time, and you are not actually using any MacOS-specific apps anymore or you just long for a unified UI experience, then installing Windows 10 on your old Apple hardware might work really well for you.