Getting Started with Altova RecordsManager
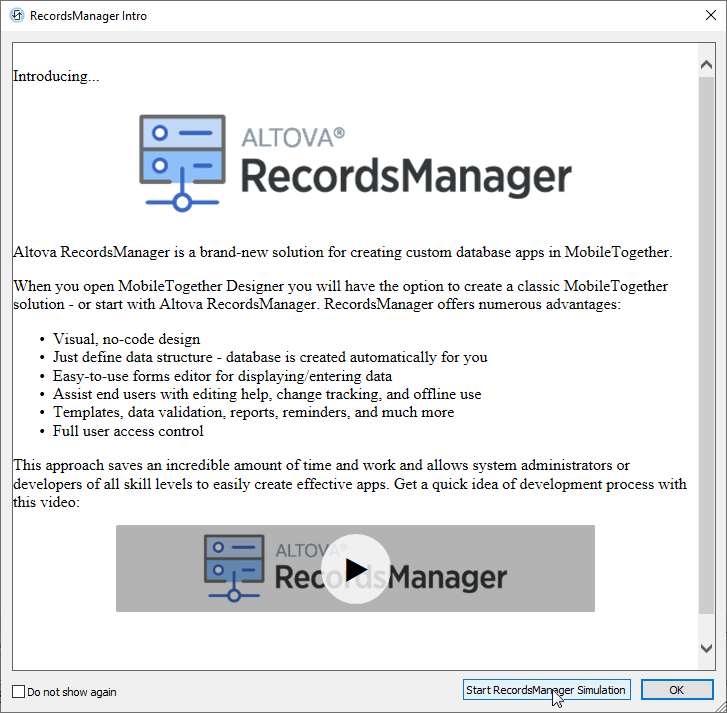
RecordsManager is a new tool from Altova to build business database solutions in record time using a powerful visual design interface. RecordsManager is a free, pre-built MobileTogether solution that is automatically available when you install MobileTogether Designer. The pre-built solution includes sample data sets, and the MobileTogether Simulator previews execution of the database solution right inside the free to use MobileTogether Designer. Getting started with Altova RecordsManager is just one click away when you launch the Designer. Soon you will be building your own custom database apps without needing backend development or manual coding.

The MobileTogether Designer is configured to automatically load the pre-built RecordsManager database solution and even offers a link to the RecordsManager features video. At the bottom of the introduction window is a button to start the RecordsManager Simulation.
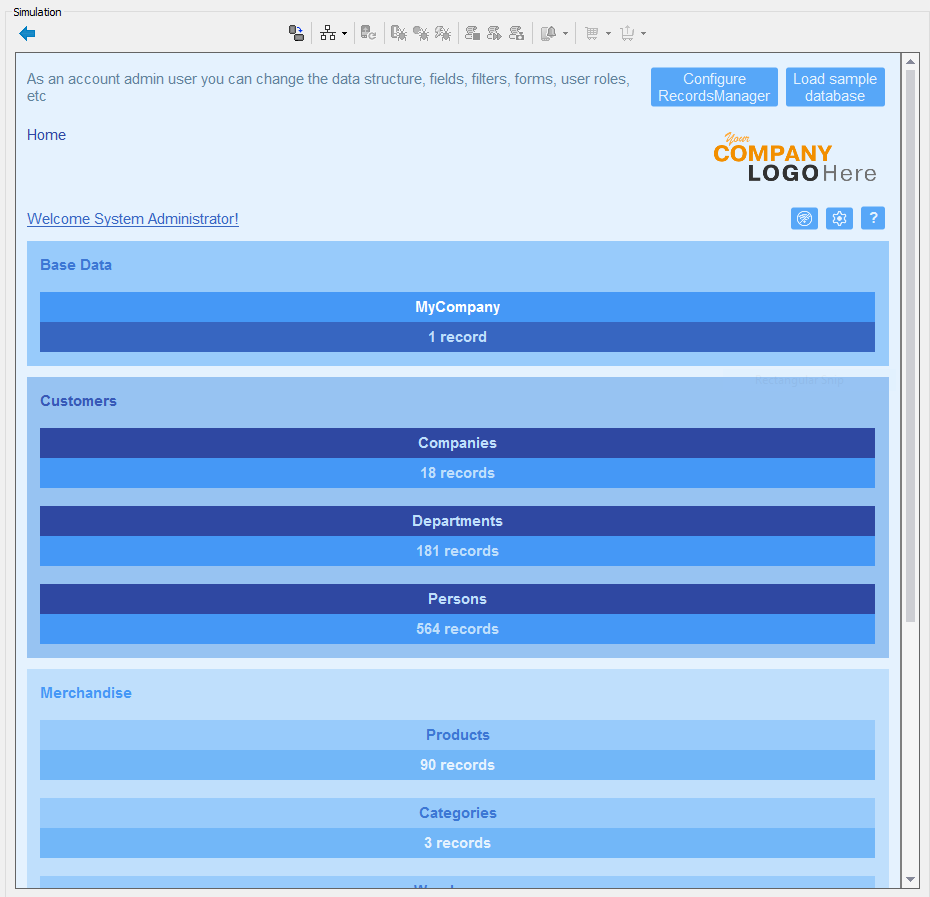
This opens the demo app in a Simulator window, where you can log in and explore the repositories, data containers, forms, fields, and filters that drive the demo app.
Going further, you can configure new users, modify views, and add data records to get a feel for working with the intuitive visual RecordsManager development interface. You can deploy your revised version of the demo app and run it directly on a mobile device or in a web browser window.
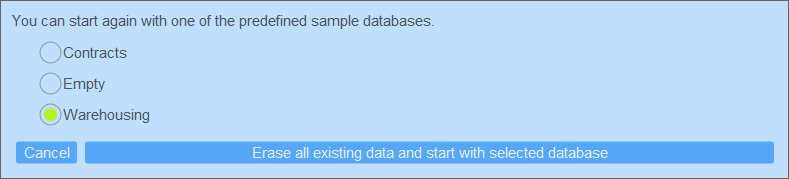
And don’t worry about accidentally deleting data or breaking the demo app when you’re just getting started with Altova RecordsManager – you can always erase all your changes and reload the default examples via the Load sample database button at the top right. We’ll start with the Warehousing business data set.
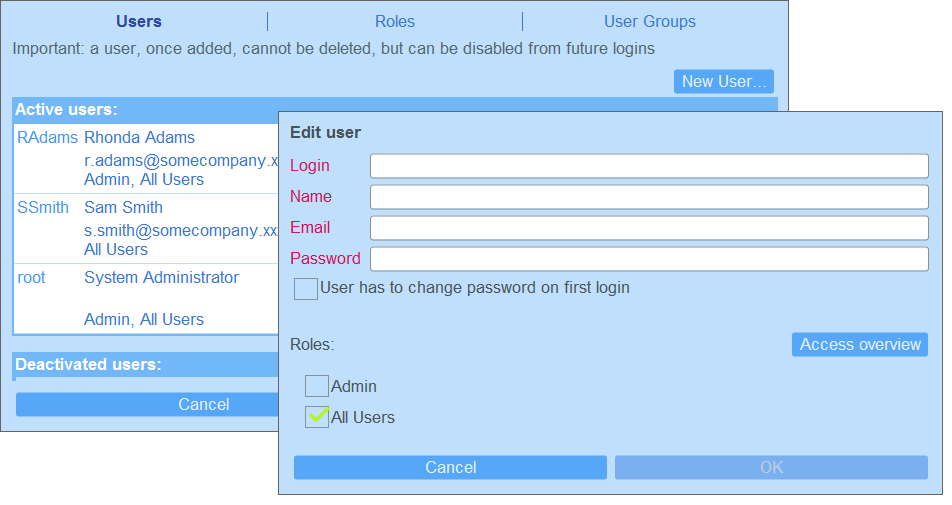
First, using the Configure RecordsManager button, we will add users with different privileges.
As you can see from the screen shot above, the built in RecordsManager entry forms let you get straight to work without having to build supporting scaffolding for the database app.
Logging in as Rhonda Adams, we can explore the Warehousing database further. For instance, we can view a list of all customers stored in the demo data set.
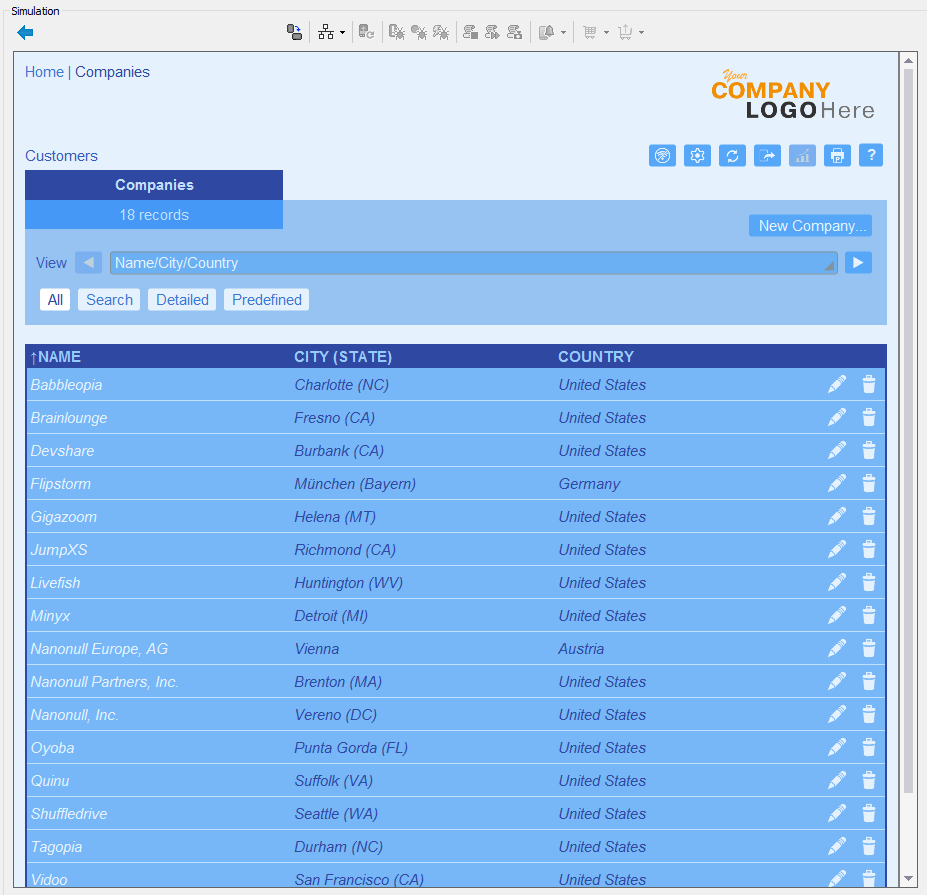
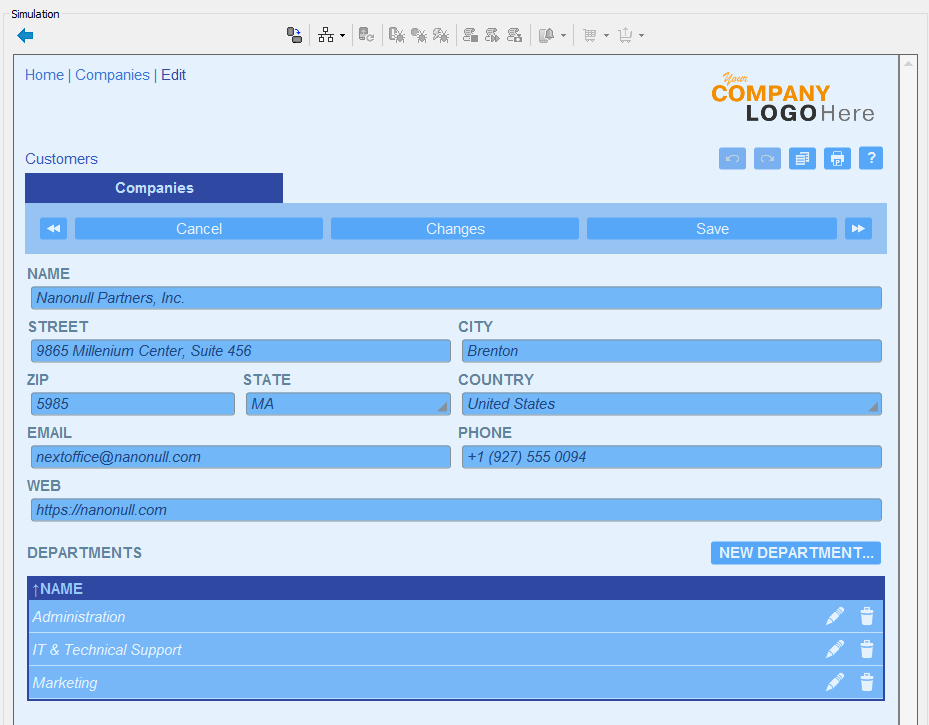
Clicking on any individual company opens a detail view:
Exploring further, we can see a table of products stored in one Warehouse:
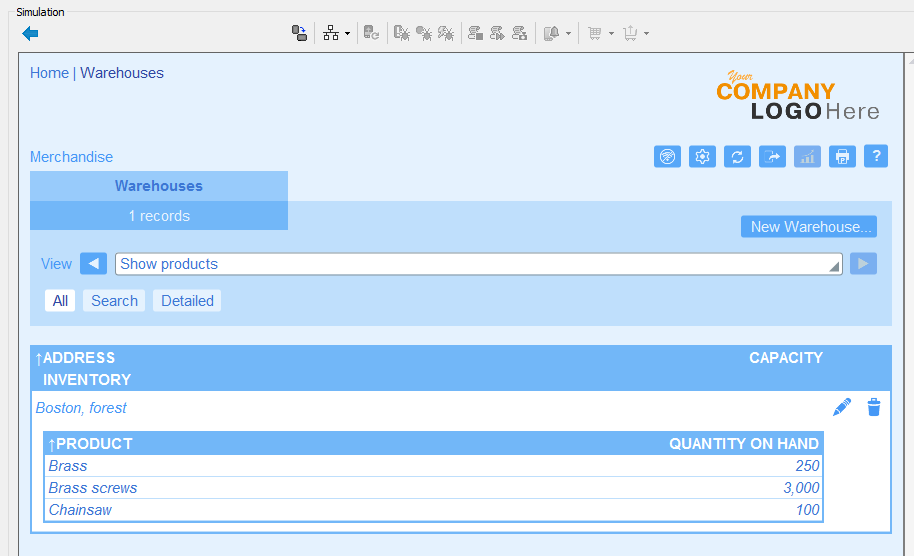
In a real-world application, a purchasing department might want to know when to reorder any particular product to restock warehouse inventory. It would be helpful to add a field for each product to store the desired minimum quantity. The Purchasing Department would know it’s time to reorder when the Quantity On Hand falls below the desired minimum.
Rhonda Adams has Admin privileges that include the abilities to edit any existing data or add a new field.
The Configure RecordsManager button on the Home page lets us add the new field:

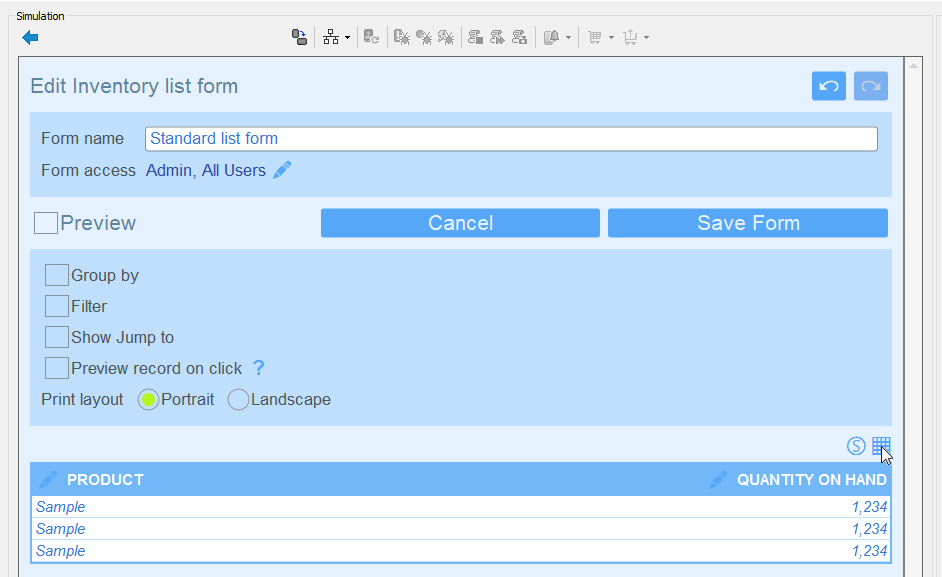
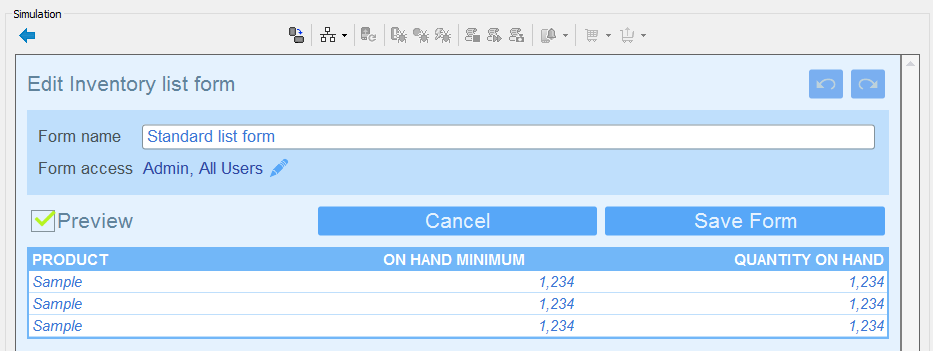
We can also edit the Inventory list and entry forms to display the new field in a pleasing format. The table button on the form editor lets us visually add, remove, or reorder table columns:
The Preview check box lets us immediately review our changes as we work. Here is the preview of our new version of the Inventory list form with the new field inserted into the table:
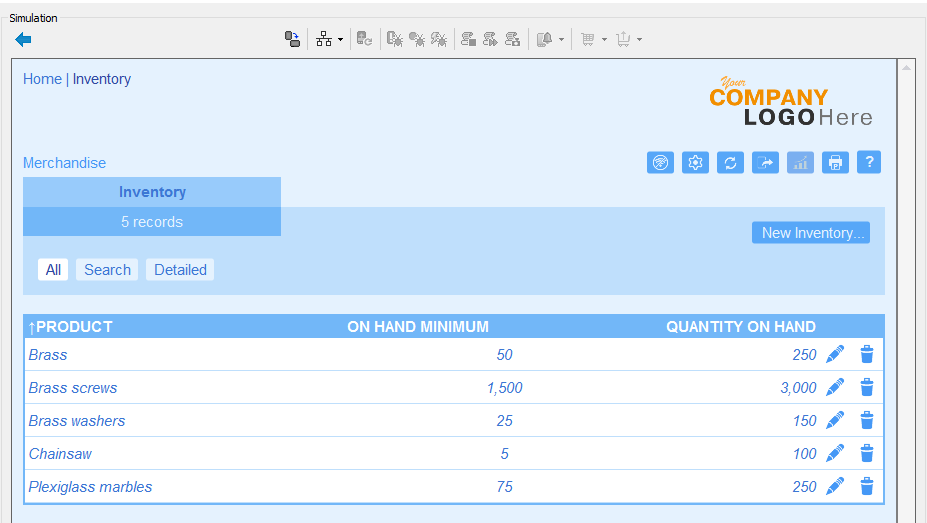
We can validate our changes by navigating back to the demo data and viewing the Inventory list form. Here is the list view with On Hand Minimums and some entirely new product entries Rhonda added:
So far, all the changes we’ve made exist only in the local RecordsManager simulation. Whether you are revising an existing app or creating a brand new custom database app for desktop and mobile devices, you will need to deploy the app to the Altova Cloud or to a MobileTogether Server to make it accessible to other users.
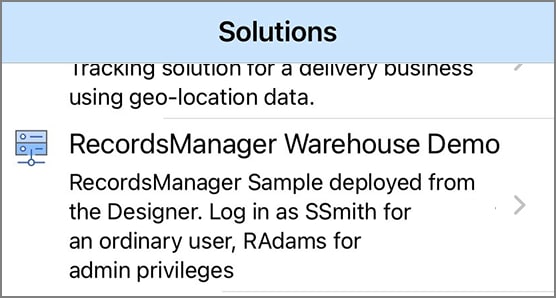
We saved all our changes, closed the Simulation, and deployed the RecordsManager demo database to a MobileTogether server with the name RecordsManager Warehouse Demo. Here is how it appears on a mobile device on the MobileTogether Solutions List:
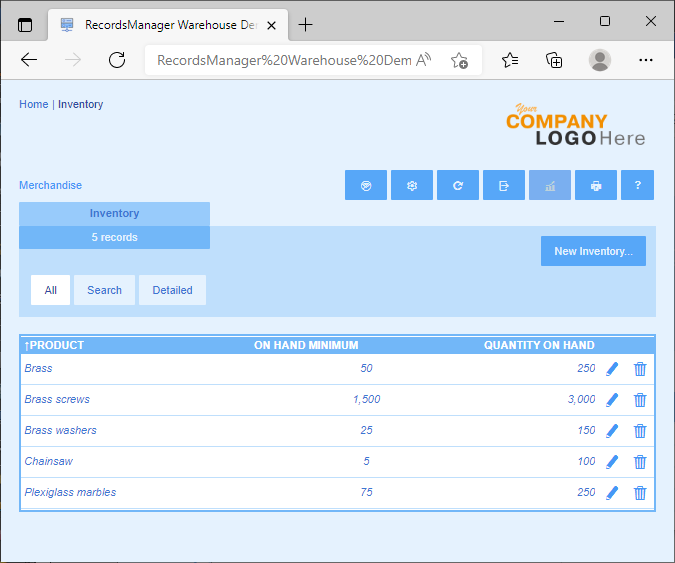
We can log in from a mobile device and see that all our changes from the Designer Simulation are visible:

Thanks to RecordsManager cross-platform functionality, the appearance will be the same on Android or iOS devices, and even in a browser window on a desktop workstation:
The MobileTogether Designer online manual includes all the details about getting started with Altova RecordsManager. When you’re ready to build your own business database solutions in record time with the RecordsManager visual design interface, download the MobileTogether Designer!
Try Instantly in the Altova Cloud
In addition to being offered as a free MobileTogether solution, RecordsManager is available in the Altova Cloud. Here, you can try it for free without needing to download software or create an account. You can even describe the database you want to create to the AI Assistant, and RecordsManager will create the corresponding database automatically!